


Previously, I showcased my working versions of my two characters to see if anyone was interested in the modeling/rigging/skinning workflow, and I saw enough interest to justify another article. I intentionally left out sculpting, complex character design, and animation, which I will cover here.
(I will still be exclusively using free, open source, or student licensed software. The staples are GIMP for photo editing, Blender for modeling, Substance Designer for texture creation, Substance Painter for painting models, and Unreal engine for rendering)
Sculpting
First off, let’s talk about sculpting. Computers have a soft limit on how many polygons they can render, depending on the activity. For instance, Overwatch characters tend to be around 35,000 polygons at the highest level of detail, while animated films such as the cult classic Emoji Movie can have much higher resolution models. For me, 35,000 polygons is plenty, but sometimes, artists have detail that is too small to be done with geometry with a limit like this. Last time, I explained that artists can build high-resolution models and bake down detail in images, which can then artificially manipulate light on a surface and give the illusion of depth. I apply this by baking my characters’ nostrils and the little cut on either side of the nose as a normal map, as well as the man’s ears and other small details. I don’t want to overdo it, as too much detail will look out of place with their unrealistic proportions.
If you compare the current renders with the earlier ones, you will notice that the hair has been completely overhauled. Initially, I used solid meshes to draw both characters’ hair, while now I use planes. This is a technical advantage in efficiency, as in 3D space each face of a mesh has a surface normal, or vector, that is perpendicular to the face and should point outward. To optimize rendering the computer can first disregard any faces that point away from the camera. Because of this function, I can greatly optimize how my characters’ hair is drawn by removing all of the faces that would always be impossible to see, i.e., faces whose normals point towards the center of their character’s head. Now, hairs that will always be drawn over by their respective character’s face will be “culled,” or completely ignored in the drawing sequence, which is faster. It also lets me do cool things like simulate cloth physics for the woman’s hair, as the geometry is far simpler.
Physics
Speaking of physics simulation, my female model uses physics to increase visual fidelity. Along with the already-mentioned hair, her skirt and the little puffballs on her socks are calculated with a physical cloth simulation. Earlier I wanted to stay out of cloth simulation because I was intimidated by the software, but due to external changes, it’s much easier to get a good-looking result now.
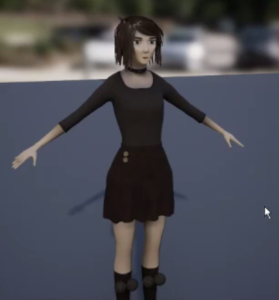
Besides an obvious wardrobe change (she was kinda goth before, now she just looks… Pinteresty. Still a big step forward). the woman has also been given eyelids. Now I should be able to make her blink.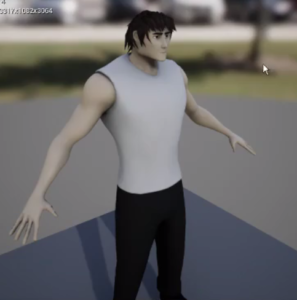
The male model has gone through less overall change, though he was also given the hair optimization and facial overhaul. His clothing is still very simple; I’m thinking I’ll switch it out for grey jeans and a tank top, to tone down the high-contrast black and white.
Animation
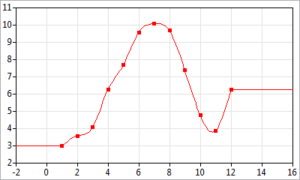
The last big topic I wanna cover is animation. An animation is really just a set of poses distributed at specific times along an interval, and a designated method of interpolating between them. In the early days of computer graphics, animators had to set the pose of a model every single frame of its animation similarly to stop-motion animation; the primitive technology could not add any frames between the ones the human-made. This is known as step interpolation because when the specific scalar transform component (xyz rotation, location, or scale of a particular bone in the mesh) is graphed as a function of time, it looks like stair steps.
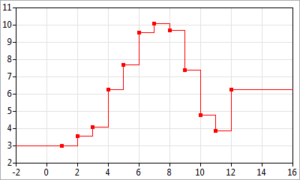
Notice how the lines are always vertical or horizontal, and therefore either are moving infinitely quickly, or not moving at all. This type of animation is mathematically unnatural, and a pain to produce, so before long computer scientists developed linear interpolation or lerping.
Linear interpolation is just creating the hypotenuses of the horizontal and vertical components of step interpolation or straight lines from one point to another. That said, animators cannot use linear interpolation to make the individual spaces between poses move intelligently outside of themselves.
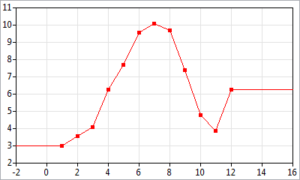
Lastly, we have spline interpolation, where the computer builds curves that illustrate the relationship between the two poses around a pose to intelligently curve into it. This allows for more natural motion, and artists can tweak the influence of a pose over its two interpolations.
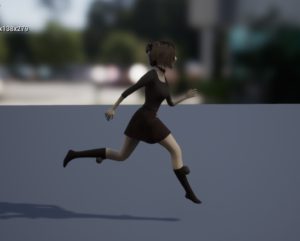
Essentially, that’s the main thesis of animation– any action can be replicated with the proper poses, timing, and interpolation. I’ll go through the process of creating a running animation. You can see my final (painfully compressed) result here.
(By the way, if you’re interested in animation but don’t want to make your own model, I recommend the recently released Paragon characters. Their rigs are a perfect example of the current industry standard and will be the best way to practice.)
Running Animation
Right off the bat if my goal is to create a looping run animation, I’m going to have to plan ahead. Because every frame represents a pose to hit at a specific time, the pose directly after the end of the animation should be identical to the first pose, so that some time is spent starting over. Other than that unintuitive detail, making an amateur looping animation isn’t too hard.
My run cycle model involves 6 major poses, with a mix between linear and spline interpolation.
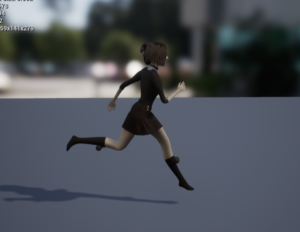
This is the first frame of the animation. Both legs are at the apex of their horizontal journeys, while the left arm is relaxed and the front is bent. An important component of this frame is the extreme twist in the hips and torso, which help to make the movement look natural. All throughout the animation, the head will remain fixed onto a vanishing point, so that the character seems to always be looking forward.
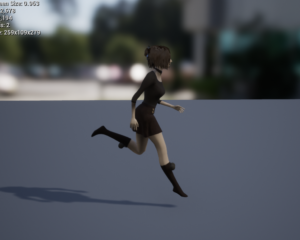
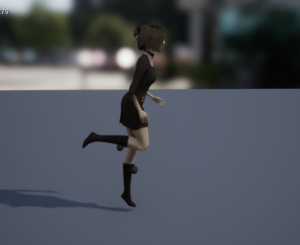
This is a minor frame because the only appendage that really needed a frame here was the left leg, which is now at its highest position. If I don’t have a frame here, her left leg wouldn’t move up in a sort of exaggerated sweeping movement that I chose for this animation.
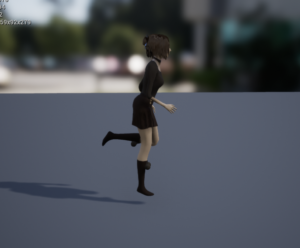
Next up is a passing frame, that helps me keep the right foot on the ground despite movements in her entire body to bounce off the ground after every step. I use linear interpolation to and from this frame, to keep her right foot on the ground at all times, as opposed to sinking into or floating above the ground.
This is the opposite of the first frame and serves the same purpose.
Here’s another passing frame combined with a right leg vertical extreme. I was able to combine these two frames because of how her right leg interpolated from the prior frame.
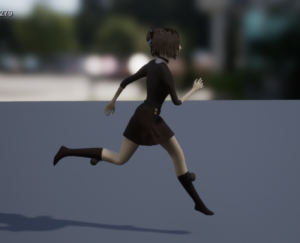
Here is the final frame of the animation. It is very similar to the first, though not exactly the same because this is the final frame before the viewer sees the first in a looping animation.
After all the frames are done, I needed to work with the splines to ensure a convincing movement. For instance, one thing I refined was the time spent on either extreme pose of the animation– the first and fifth frames I mentioned. To make a convincing animation, I want it to look like the bones take time to decelerate and accelerate in the opposite direction. To do this all I had to do was increase the weight each of these poses had on the spline.
Future Plans:
Some things I notice as possible areas to improve my models are as follows:
- A better eye shader. As of now, I cast a 3-dimensional image of shine onto a picture of a cornea. This approach has two major flaws. One, the shine is too cartoony and doesn’t account for the objects around the character’s eye, or even the ambient color. This may seem like a minor detail, but if I ever want to zoom in on an eye, this missing detail will be painfully noticeable. Two, the eye will not refract, or, in other words, the pupil will look like it is painted onto the lens of the eye as opposed to contained within it. This can give a serious uncanny valley look, that the face is somewhat human but missing too much to be charming.
- Wrinkles in the clothing. Their clothes look like spandex or superhero fabric. This would be where sculpting comes in handy, as I’ll make a version of their clothes with wrinkles and bake maps down.
- Facial Rig. As of now, they cannot even blink.
- Better inside mouths. If a character can speak, they need to have a decent looking mouth. Teeth, gums, and a tongue will take up texture space I hadn’t allocated, which will present a challenge when I get around to it.
- Better vertex distribution (topology), specifically in fingers. For a joint to bend well, artists need to add a few more triangles so that it still looks like a joint, and not a bunch of triangles in the shape of a joint, for any angle the bone needs to bend.
If you have any feedback, I’d love to hear it in the comments or by email at 19046@jcpstudents.org.


